> For the complete documentation index, see [llms.txt](https://docs.linuxfoundation.org/lfx/llms.txt). Markdown versions of documentation pages are available by appending `.md` to page URLs; this page is available as [Markdown](https://docs.linuxfoundation.org/lfx/project-control-center/v2-latest-version/operations/domains/setting-up-email-forwarding.md).
# Setting up Email Forwarding
## Email Forwarding
After setting up the domain for a project, you can set up email forwarding for the project. This service is email forwarding only, and cannot be used to send emails.
{% hint style="warning" %}
To use this feature, you must have a Primary Domain set up for the project.
Currently, you can only set up email forwarding for the Primary Domain. To change a primary domain for a project, you must contact support.
{% endhint %}
To enable email forwarding, follow these steps:
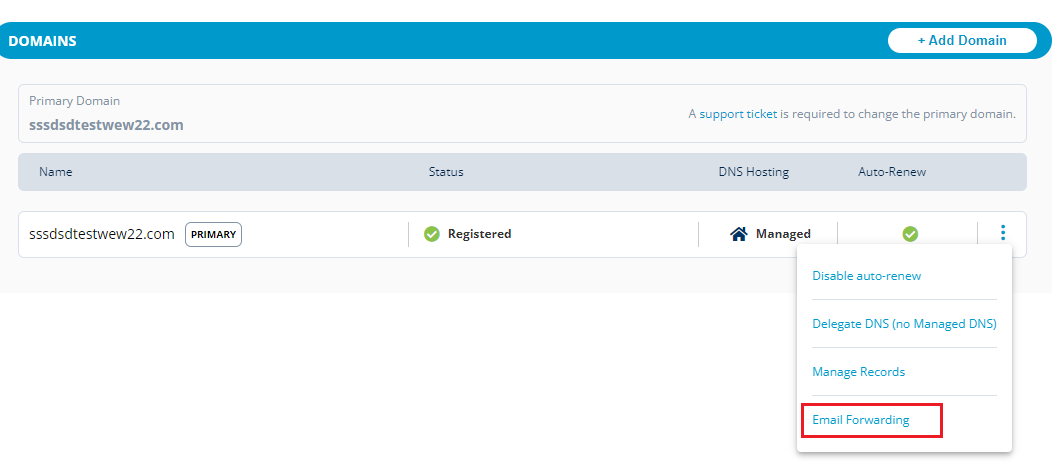
1.Go to the domains list and click the  icon from the primary domain and select Email Forwarding.
Email Forwarding
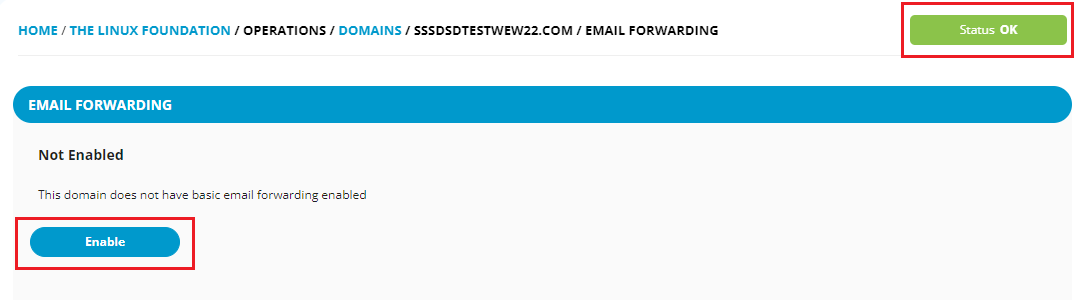
2.The flyer message is displayed with status Ok message. Click **Enable** to enable the Email Forwarding.
Enable
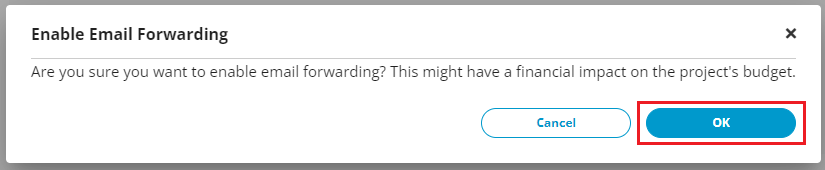
3.A pop confirmation message appears. Click **OK** to proceed with email forwarding.
Confirmation Message
4.A flyer message appears informing that the email forwarding is successfully enabled.
### Add Email Recipients
You can add the email recipients after enabling the email forwarding service.
To add email recipients, perform the following:
1.After enabling the email forwarding service, the Email Forwarding page appears. Click **+ Add Forward**.

2.The Add Email Forwarding dialog box appears. Enter the **Alias** name. Click **Add Recipient** and enter the email ID and click **Add**.

### Remove Email Recipients
1. In the same Email Forwarding section, select a Forward and edit it using the penicl icon.
2. In the recipients list, use the trash icon to remove the email and hit Save.
### Troubleshooting: "My forwarded emails aren't arriving"
If Email Forwarding is enabled and shows no errors, but a specific test message never seems to arrive, check **who sent the test email** before assuming forwarding is broken:
{% hint style="warning" %}
If you forward your address (for example, `you@linux.com`) to your own Gmail account (`you@gmail.com`), and then send a test email to `you@linux.com` **from that same Gmail account**, Gmail will silently suppress it from your inbox. Gmail assumes that since you sent the message, you already have a copy of it — this is normal Gmail behavior, not a forwarding failure.
{% endhint %}
To test forwarding accurately, send the test message from a **different** email account than the one it's forwarding to. If the forwarded mail still doesn't arrive when tested this way, contact support with the domain and alias so the forwarding logs can be checked.
---
# Agent Instructions
This documentation is published with GitBook. GitBook is the documentation platform designed so that both humans and AI agents can read, navigate, and reason over technical content effectively. Learn more at gitbook.com.
## Querying This Documentation
If you need additional information that is not directly available in this page, you can query the documentation dynamically by asking a question.
Perform an HTTP GET request on the current page URL with the `ask` query parameter, and the optional `goal` query parameter:
```
GET https://docs.linuxfoundation.org/lfx/project-control-center/v2-latest-version/operations/domains/setting-up-email-forwarding.md?ask=&goal=
```
`ask` is the immediate question: it should be specific, self-contained, and written in natural language.
`goal` is optional and describes the broader end goal you are ultimately trying to accomplish on behalf of the user. GitBook uses it to tailor the answer towards what is most useful for that goal.
The response will contain a direct answer to the question and relevant excerpts and sources from the documentation.
Use this mechanism when the answer is not explicitly present in the current page, you need clarification or additional context, or you want to retrieve related documentation sections.